How to make a pumpkin carving stencil from a photo
A carving pattern is a stencil: the dark shape on the page is the part you cut away, and everything else stays. The stencil maker turns a picture into that shape, adds short bridges so the middle of an eye or a letter does not fall out, and prints the pattern at the real size of your pumpkin. Cutting a pumpkin is a job for an adult. Children can choose the design, tape the paper on and help draw the lines.
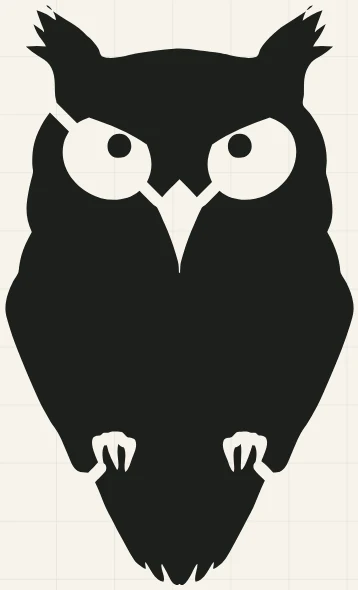
The picture decides most of the result. A flat black shape on a plain background, such as an owl, a bat, a cat or a moon, turns into a clean pattern at once. A photo with a busy background does not, and the examples below show both.
What makes a good pumpkin pattern
- Few, wide shapes. A pumpkin wall is thick and cut by hand. Thin necks and hairlines snap, so a bold silhouette beats a detailed drawing.
- Bridges that hold the islands. The pupil of an eye is a piece of pumpkin surrounded by cut-away space. A bridge is the short strip you leave across the gap so the piece stays in place. The stencil bridges guide explains how wide to make them.
- One picture, one idea. A pumpkin face is small. Pick one subject and let it fill the page.
Step by step
- Pick a flat, high-contrast picture. A silhouette or icon is the easy case. The pictures used on the Halloween projects page are public domain or CC0, and each has its credit under it.
- Open the stencil maker with Halloween settings. The button on the Halloween projects page opens the tool with 5 mm bridges and a 6 mm smallest-piece mark. The link carries only those settings, never your picture. Then drop your picture on the page.
- Set the width to your pumpkin. Measure the flat part of the pumpkin's face and type that into Artwork width. The pattern is drawn at that size.
- Look at the red marks. Red outlines show parts narrower than the thin warning, which are the parts likely to snap. Make the picture bolder, or accept that you will cut that part with care. Blue strips are the bridges that were added.
- Choose what you cut away. Dark parts is the default. If your design is a light shape on a dark ground, choose Light parts.
- Download the Print-ready PDF. It is the stencil at true size on Letter or A4, with a one inch square (25 mm on A4) so you can measure the print. Print at 100 percent, never "fit to page". A pattern larger than one page is tiled across pages with a 0.3 inch overlap.
- Transfer it. Tape the page to the pumpkin. A round pumpkin will wrinkle a flat page, so make a few small cuts in the paper's edge so it lies down. Poke along the lines with a pin or a poking tool, take the paper off, and join the dots with a marker.
- An adult cuts. Cut slowly with a proper carving saw, keep fingers out of the line of the blade, and cut small pieces from the inside outward. A battery light is a safer way to light the pumpkin than a flame.
What a busy photo does
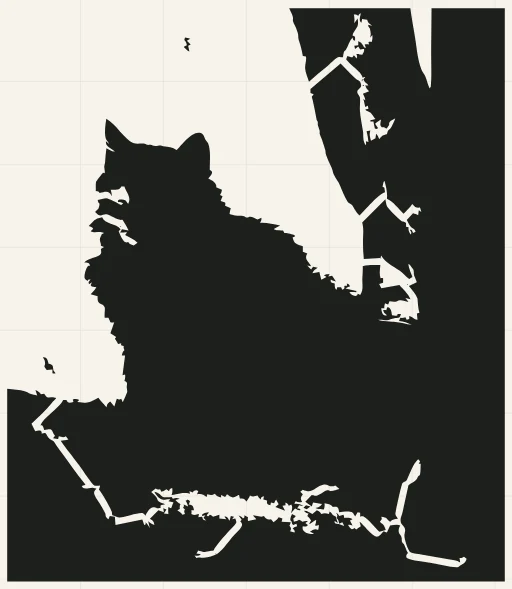
A photo is not a flat shape. We dropped a CC0 photo of a long-haired cat, sitting against a wall beside a tree, into the stencil maker with its normal settings. The tool does not know which part is the cat. It sees dark regions and light regions, so the cat, the tree and the ground merge into one black shape, and only the pale wall drops away.
The fix is to separate the subject first. Open the background remover, save the transparent PNG, and drop that into the stencil maker. We tried exactly that with the same photo, using the quick cut, which takes about a second.
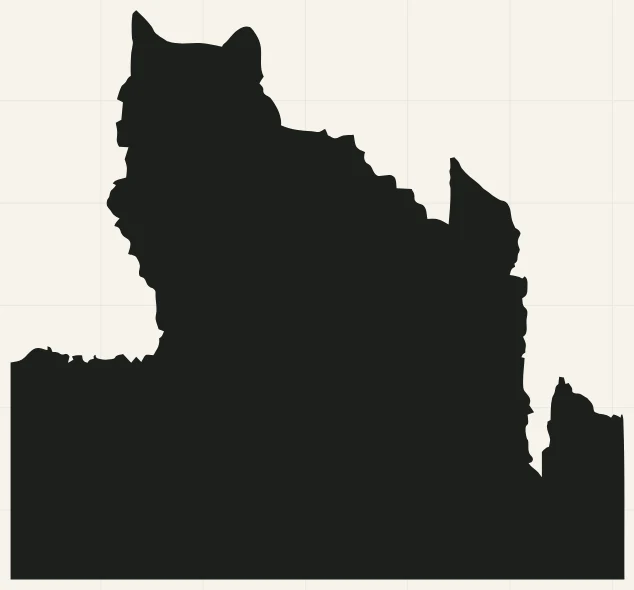
That is a real cat outline, which the first attempt was not, but it is not finished. The quick cut kept a slab of the wall and ground along the bottom, and the background remover itself says so. Its Better cutout is a trained model that finds the subject more reliably, with a one-time download of about 172 MB that your browser keeps. Its Remove brush paints out anything left behind. We did not run Better cutout on this photo, so we cannot tell you how it would have come out.
When it will not work
- Fur and fine detail. A fluffy outline becomes a ragged one, and ragged edges are the first to break on a pumpkin.
- Little contrast. A black cat on a dark sofa has no edge for the tool to find.
- Shading. A stencil has one color. A shaded photo turns into one big shape with no inside, so use a silhouette, or a drawing with clear lines.
If the result is a blob, start from a simpler picture. Every one of the Halloween examples is a flat shape for that reason.
Try it on your own design
Free, in your browser, nothing uploaded.